Wood Hand Sander
When smoothing large, flat wood surfaces, nothing beats the high speed and brutal force of a belt sander. But there is nothing like a good hand sander for the details in small DIY jobs.
A hand sander is a hand tool used to sand rough materials and uneven surfaces, such as walls, floors and other large, flat areas.
Manual Wall Sander and Hand-held Plaster Sander
These sanders are used on the drywall to smooth surfaces and remove excess adhesive. The longer reach on most models allows for use on ceilings and other locations that would normally require frequent moving of a ladder to cover it. More like a metal detector than a sander, they are usually disc sanders on a long pole. Most models incorporate a vacuum to collect dust particles.
Manual Disc Sander
These sanders are round discs that rotate once added to the end of any drill. Mounted sanders use a wheel instead of a disc, which gives them more surface area. Various grit sizes can be applied to these sanders, depending on the job.
Due to the rotational speed of the disc, the portable version is perfect for giving a uniform finish to large areas. The stationary version works so well that it can be used on both metals and plastics as well as wood, and often has an adjustable surface to adjust the workpiece at angles.
Manual Electric Sander
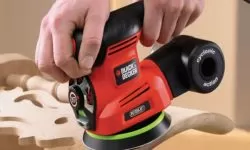
Orbital sanders are compact tools that can be used with one hand and have excellent handling. This is why they are considered hand sanders.
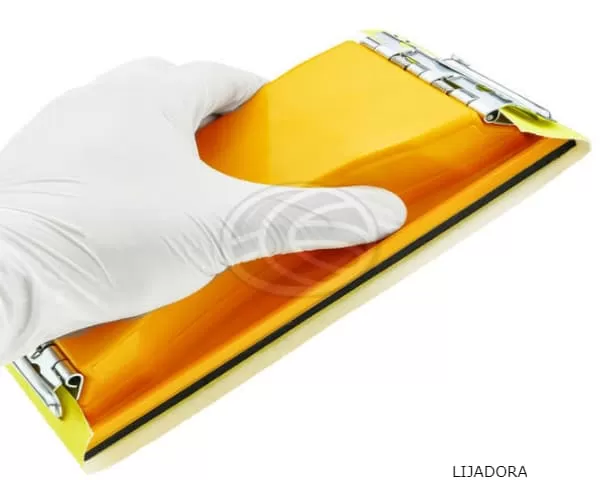
This paper is held on the flat sanding surface with two spring clamps. Many of the nicknames for this sander are derived from the tiny circular orbits in which the sanding pad vibrates.
Brands of Manual Sanders
Wolfcraft
The wolfcraft hand sander can be used to smooth joint welds and break up the edges of gypsum boards, fibrous plaster, porous concrete etc. It is an indispensable tool for your home or workshop!
Stanley
This hand sander is a popular sander made even better with a comfortable float handle. Beautifully balanced, this clamp-on style sander is now easier to use; it won’t cut or bend your hand. Wing screws tighten clamps securely on sandpaper.
Timesetl
If you’re a carpenter, you know all about sanding. This handle allows you to place a piece of sandpaper on the hard side covered with foam and gives you a better grip on the sandpaper than you would have without the handle. Ideal for hand sanding on drywall, wet walls, wood or metal surfaces.
How to Make a Hand Sander ?
- Make a very cheap, easy and comfortable sanding block.
- Cut a length of 2-1/2″ from the 2×4. This will be the sanding block.
- Place the foam or filler of your choice on top of the block. Cut several strips of tape about 3-4″ long and tape over the filler to the sides of the block. Do this until you have the filler completely secured and decorated with an elegant tape.
- Fold and tear a piece of sandpaper in half. Turn the block upside down, place the piece of sandpaper on top, and fold each side so that it is fairly even. Now staple each side, securing the sandpaper to the block.
- When you need to replace the sandpaper, all you have to do is pull the staples or even staple a new piece directly onto the old one.
How to Use a Handheld Sander ?
Use a hand sander, simply follow these quick and easy steps:
- Step 1 – Before you start sanding, you must choose the size of sandpaper grain that best suits the job in hand.
- Step 2 – Place the sandpaper or pre-cut sanding sheet on the base of the sander. Fold the edges of the sandpaper over each end of the base to make sure it fits.
- Step 3 – The sandpaper can be held in place using the clamps on each end of the sander. Simply loosen the clamps, insert the edges of the sandpaper under the brackets, then tighten the clamps until the sandpaper is secure.
- Step 4 – Grasp the handle, making sure your hand is in a comfortable position.
- Step 5 – Sand your material by pushing the sander back and forth in one continuous motion. Be sure to sand along the grain on wood surfaces, moving the sander in the direction that the wood fibers are pointing.
If your surface area has a more complex design, for example, with protruding parts, you can hand-sand them with a piece of sandpaper.
Once you have completed your initial sanding, you may want to replace the original sandpaper with a finer one and repeat the steps again to give it a final touch. Ideally, you should progress from macro to micro grits, changing one grade at a time.
How To Sand a Floor With a Hand Sander ?
- Each individual block on a parquet floor varies in density from one to another and can even vary within the block from one side to the other. So, when the sander goes through a block that is much less dense than the rest of the floor and the drum is sanding that block alone, it is going to sand much more than the rest of the floor.
- Now, before we continue, I must say. This variation in density means that the floor will never be perfectly flat. Getting it as flat and smooth as possible is our goal.
- Use the varying densities of all the blocks to regulate the pressure in each block. Then you must change direction from line to line. This helps eliminate any imperfections caused by the sander.
- Therefore, your process should be direct at 36 degrees, at 50 g, directly at 80 g, at 100 g and finally at 120 g.
- In this case, I would definitely recommend making the final sand diagonally so that, if the scratches do not come out after polishing, they will be relatively imperceptible.
Reference Prices in Dollars for Hand Sanders
The prices in the market are very varied, we can find hand sanders from 10 Dollars with an excellent quality.
Related Products in ALPHAPEDIA

GIRAFFE SANDER: Brands like Makita. Models and Prices

SANDER BRANDS such as DEWALT, TACKLIFE and BOSCH

WOOD SANDER: Great Price on Qualified Products

ORBITAL BLACK AND DECKER SANDER: Great Price on Qualified Products

MAKITA BELT SANDER: Great Price on Qualified Products

💚 WALL SANDER: ¿ How to Use It ? Brands and Models
Other Topics of Interest in ALPHAPEDIA

FREE MASTER DEGREE IN HUMAN RIGHTS

FREE HORSE RIDING COURSE

PERSIMMON: Origin, Properties and Benefits

FREE DOCTORATE IN PUBLIC RELATIONS

TYPES OF DOCTORATE DEGREES

FREE DANCE COURSE
Image of Manual Hand Sander


