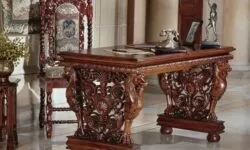
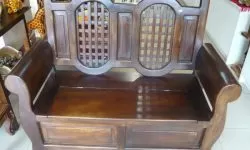
To Restore a Wooden Table:
- First, sand the old finish. This will probably take about an hour or two, and you’ll want to do it outside if possible.
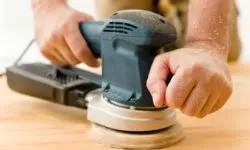
- You may also consider routing the edges of your table to match other furniture in the dining room. Sand the entire table by removing all stain or wood stain from the edges and legs. If you use an orbital or belt sander, be careful not to damage the surface.
- Do most of the initial sanding and varnish removal with 100 grit sandpaper, then go up to 150 grit and make a final pass with 220 grit to smooth out the grain for the new finish.
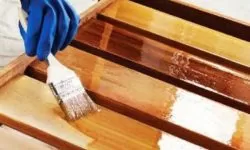
- Carefully remove all sanding dust with a sticky cloth.Apply the stain or wood stain with a brush, following the natural grain of the wood. Apply the stain or wood stain generously, allow it to penetrate for a few minutes and then wipe off the excess.
- Tip: The longer the stain or wood stain before cleaning, the darker the final color.
- Apply at least two coats of the wood stain or ink. Depending on the depth and richness of the desired color, apply more coats. Sand lightly with 220 grit paper and wipe off with a sticky cloth between coats. Note: When staining wood, the wood fibers swell to absorb the stain or wood stain. The reason for sanding between coats is to bring down the swollen fibers to maintain a smooth surface.
- After the final layer of the wood stain or ink has dried completely, apply polyurethane according to the manufacturer’s instructions. Apply at least four coats, since dining tables are widely used.
- Allow the polyurethane top coat to dry for at least 24 hours before using the table.
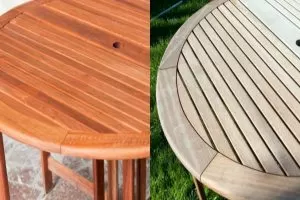
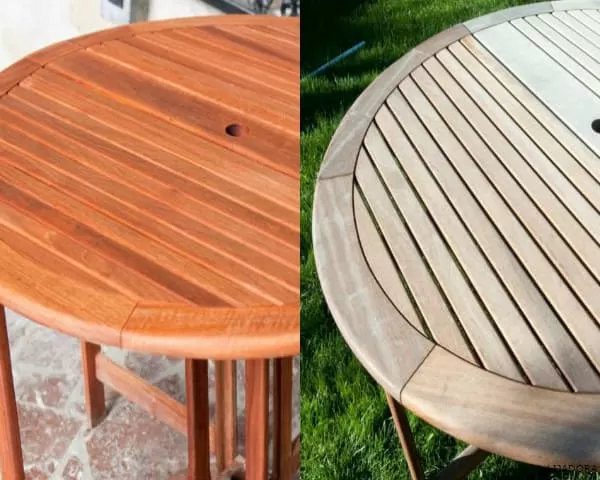
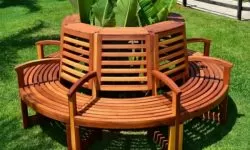
Restoring Wooden Garden Tables
Due to the fact that wooden garden tables are often exposed to the elements, such as rain, snow, ice, sunlight and extreme heat, these parts require very specific care and maintenance on at least a regular basis.
For many people, finishing wooden outdoor furniture is considered a complete mystery or an annoying task. Instead of buying new furniture or paying professional painters and repairers, you can easily refinish outdoor wood items by following a few simple, practical tips.
Removing the Old Finish
- Perhaps the only benefit of outdoor wood furniture exposed to the elements is the fact that this often loosens the old finish, allowing for relatively painless removal.
- Whether you are trying to remove paint or wood stain, the easiest first step in removing the old finish is to use a pressure washer or a high-pressure hose (high-pressure hoses can be found in most modern car washes).
- Spraying furniture with a pressure washer or high-pressure hose not only removes dirt and debris, but often also removes excess flaking of the original finish.
- Once the item has dried completely, sanding is usually required to remove the remaining finish and ensure a smooth and even surface.
Applying the New Finish
- When it comes to repainting most furniture, the method of application is often questioned. While some people prefer to use traditional brushes, foam brushes are an excellent alternative.
- Like traditional brushes, foam brushes are available in a wide variety of sizes, allowing them to be used in the smallest of nooks and crannies. The benefits of foam brushes that traditional brushes do not offer include a smooth, even texture, the ability to soak up excess paint or stain, and virtually no mess.
Allowing the New Finish to Dry
- The amount of time required for the paint or stain to dry completely depends on the product and the manufacturer. It is important to study the product packaging to ensure that you understand the amount of time required for complete drying.
- Many people make the mistake of leaving wet, freshly finished outdoor furniture outside while it dries. This often results in dirt and debris drying on the paint or stain.
- To prevent unwanted residue from coming in contact with the finish, it is advisable to let the finish dry with a sticky texture and move it indoors (like a shed or garage).
Restoring Antique Wooden Table
- To restore an antique wood table, use a commercial oil-based wood cleaner to cut away the layers of dirt and wax on the surface of the piece, or use a solution of warm water and liquid detergent.
- Apply the mixture with a cloth, being careful not to let the wood get too wet. Rinse the area well and dry with a soft, clean cloth.
- To repair the finish, use a solvent applied directly to remove the imperfections. Clean the part, then choose a solvent; Denatured alcohol for lacquer or lacquer thinner on lacquer. Apply the solvent to the finished surface with a natural bristle brush, working quickly without allowing the brush to dry too much.
- As the solvent dries, it will first appear glossy and then opaque to a finish, without cracks or scratches. Clean the area slightly with steel wool, working in one direction along the grain of the wood.
- To add additional gloss, finish the process with a hard paste wax application. Working from the top down, apply the stripper generously in one direction, wait five to 20 minutes, depending on the thickness of the finish, and then start scraping the surface with a spatula, then switch to a liquid remover, apply the liquid with a natural bristle brush and let it stand for a few minutes.
- Perform a final rinse with cleaner to remove the last layer of finish. Sand the part with 100-120 grit sandpaper, then vacuum and wipe the surface with a sticky cloth.
- Apply a sanding sealer and allow to rest overnight to enhance a second sanding the next day. The second sanding should be done with 220 grit sandpaper before applying the finish. Use lacquer, varnish or polyurethane to protect the wood.
Restoring Painted Wooden Table
To Restore a Painted Table First:
Remove anything that cannot be removed from the paint that can be removed (knobs, tugs, hinges, etc.) This will make your job much easier. If you have items that can’t be removed (such as upholstery), cover them with heavy 6-millimeter plastic sheeting and hold them steady with painter’s tape.
Start with the Heat Gun
Remove as much paint as possible with the heat gun and metal scrapers. You may be lucky and this will remove all the paint. However, it will most likely remove some paint, but not all.
Do not point the gun in one place. Instead, move slowly in a circular motion. The weaker paint will start to curl. In more difficult areas, scrape gently with a metal scraper. The paint should soften and become similar to clay, which can be scraped off.
Continue with Paint Strippers
Once you have removed as much paint as possible with the heat gun, use a paint stripper to remove the rest. If you’re chemical averse, a citrus-based stripper is for you. The smell is not offensive, and some users even find it pleasant. It’s non-toxic and non-corrosive.
Apply the stripper with an acceptable brush; usually the instructions on the stripper will tell you what kind of use. Apply in a thin layer. Wait the amount of time required for the stripper to soften the paint.
Scrape off the softened paint
A familiar adage with paint strippers is: Let the stripper do the work. This means that strippers have a certain amount of time that it takes to do their job. Before that time, you are only creating more work for yourself. Wait too long and the softened paint will eventually harden. For example, citrus-based strippers should be allowed to sit for at least 30 minutes, but no more than 24 hours.
You should only gently scrape off the remaining softened paint. Then you can repaint your table in the color of your choice.
Restore Pine Wood Table
To Restore a Pine Wood Table:
- Make sure the room is well ventilated. Sand the table with 60 grit sandpaper this will remove any previous finish, then level the wood with 80 grit paper. Always sand in the direction of the grain.
Once you have finished sanding, spray a fine mist of water on the wood grain; this will raise the grain and allow for a finer sanding. Then re-sand with 120 and 220 grit sandpaper. You can use an orbital sander instead of hand sanding. - Whichever method you choose, be sure to start with medium and thick papers, and then use thin papers to smooth the surface.
- Apply wood conditioner to the table before staining it with stain: the conditioner will prevent uneven stains. Clean the stain on the table with a cotton cloth; old t-shirts work well.
- Remove any excess stain with another cloth. The depth of color can be achieved in several layers, so you don’t have to try to get all the color at once.
- Re-coat as many times as you wish to achieve the desired shade. Use a fine-bristled brush to apply the finish. Remember to keep stains and finishes matched so that oil-based stains blend with the oil-based finish.
Restoring Exterior Wooden Table
To Restore an Outdoor Wooden Table:
- Clean the wood, use an outdoor wood cleaner. Follow the instructions on the container and allow the wood to dry before staining.
- Apply masking tape for a two-tone appearance, apply masking tape to the edges of the decorative pieces to separate the two colors from the stains.
- Apply primary colorant. Apply a semi-transparent wood stain to the undersides of wooden furniture, following the instructions on the package.
- Apply the secondary stain color on the top of the table.
- Allow the stain to dry. Make sure the wood table is completely dry before use.
Restoring Varnished Wood Table
To Restore a Varnished Wooden Table:
- Thoroughly clean off any dirt, oil or grease. Sand with 60 grit sandpaper to remove the varnish. Now wipe your table with a cloth, so that it is free of dust, then sand again, this time with 120 grit.
- Apply your color or don’t apply any color. Clean everything and then make a pass with your finest sandpaper and clean the dust. Apply another coat, it all depends on the depth of the color you are looking for, sand the coat as soon as it is completely dry, and then proceed with the painting.
- A clear coat is recommended, look for polyurethane or polycrylic, which require two coats.
Restore Striped Wood Table
To Restore a Striped Wood Table:
- The spray paint stripper is really convenient because it is easy to control and does not spill. Spray the paint stripper evenly on the surface and let it stand for 5 to 10 minutes. You’ll see the old finish begin to lift off the wood.
- Use a scraping tool to remove the old finish. Wipe the blade with a disposable shop cloth between scrapes. You may need to apply the stripper and scraper more than once to remove most of the old finish.
- Once you have finished stripping and the surface is dry, wipe with mineral spirits and a clean cloth to remove any residual remover. Allow the table to dry completely before sanding.
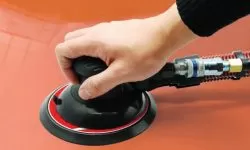
- To remove the last bits of finish, use a palm sander with medium grain sandpaper (about 150 grains) until you see the bare wood. Then switch to fine sandpaper (over 200 grains) until the entire piece is uniform and no stripes are visible on the wood.
- Wipe the entire surface with a sticky cloth to remove sanding dust.
- Staining is easier to do with a staining pad. Dip the pad into the stain and clean it using long, even strokes.
- Then use a clean cloth to remove excess stain. Wipe lightly with the grain to avoid scratches. You will need to apply several coats until you like the color. Follow the same process, but be sure to let the stain dry between coats so you can measure how it looks before deciding whether to add another coat.
- Once the last layer of the stain is completely dry, apply a clear oil-based layer for a final layer of shine and protection.
- The clear spray coat is easy to use and provides great coverage. Spray with a nice even motion following the natural lines of the piece. Apply two coats, sanding between them with 200 grit sandpaper or higher after the first coat is dry.
- This technique will smooth out any imperfections from your first coat and give you a professional-grade finish. Then spray over a final coat.
- After clear coating, allow the finished piece to cure completely in a warm, dry, well-ventilated area for 24 hours before use. Your options for staining are unlimited. No matter what color you choose, you will give new life to an old piece of furniture.
Restore Veneer Table
To Restore a Veneer Table:
It is possible to repaint a veneer table. It is the ability to sand the surface that determines whether you can remove the existing finish. Some veneers are so thin that when you sand the surface, you end up sanding through the veneer. If you are lucky enough to have a part with a 1/4 inch veneer, the part will respond perfectly to this finishing process.
Step 1 – Evaluate the damage to the sheet
- It is essential that all damaged areas are repaired on the surface of the veneer furniture. Sometimes, for example, the corners of the veneer are lifted off the furniture when the glue begins to disintegrate.
- Other repairs such as water damage, bubbles and missing or split veneers should also be repaired at this time.
Step 2 – Repair the damaged areas
- A thorough procedure, the repair of any damaged veneer is essential for the proper refinishing of veneer furniture. Bubbles, divisions and corner lifts follow the same basic steps for repairs.
- For a bubble, tape the area with a couple layers of masking tape and cut the bubble with a craft knife with a #10 blade.
- When you are adjusting the areas, the sheet may have swollen due to water infiltration. If this is the case, carefully cut off both sides of the damaged veneer until the piece is flat.
- Clean off glue and debris from the damaged areas and the underside of the veneer, then reattach with yellow carpenter’s glue.
- For water damaged and scratched areas, if the damage is on the surface, it will be handled when sanding to remove the veneer finish. For areas lacking veneer, you should create a veneer patch of the same grain and glue it in place.
- Some parts may also need to be fastened while giving the glue time to dry. With all repairs done correctly, the part is ready for restoration.
Step 3 – Finishing the Veneer Surface
- With all cuts, patches and glues completed, it’s time to remove the previous finish.
- The thickness of your veneer will be important in determining what type of technique to use for this task. To determine this thickness, open a drawer or turn the piece upside down to see the width of the edge of the veneer.
- With very thin veneers, it may be best to remove the finish with a light rub of denatured alcohol, lacquer thinner or other protective coating remover and #000 steel wool.
- For wider veneers, carefully sand the surface, avoiding sanding through even these thicker panels. Clean dust with a sticky cloth. Never use water for cleaning, as it will cause swelling and be problematic with the final protective layer.
Step 4 – Stain and Protect the Veneer
- With a foam brush, apply your new stain to the piece. Wipe off excess stain after five minutes and then allow to dry for 24 hours. Repeat until the desired color is achieved.
- Then apply the protective layer (lacquer, shellac or polyurethane) with a natural bristle brush. You should allow 24 hours between these coats for the drying time.
- Sand lightly with 320 grit sandpaper after each coat and wipe off with a sticky cloth before applying another coat for a smooth finish. Repeat this application at least two or three times for several coats of protection. Allow the final coat of veneer furniture to dry 48 hours before use.
Restore Vintage Wooden Table
To Restore a Lacquered Wood Table we will explain in three steps the process so you can do it:
1) CLEANING
- One of the most common problems with most finishes is that they are simply dirty. The build-up of waxes, polishes, smoke and dust can become so heavy that the beauty of the finish and the grain pattern of the wood can be obscured. This problem can be solved successfully by virtually anyone. There are solvents formulated specifically for this job, such as wax remover .
- Wet the steel wool with the solvent and gently rub the surface. You can start by gently scrubbing in a circular motion, but then finish by scrubbing with a little more force in the direction of the grain. Wipe the surface with disposable towels. If the surface is clean enough, you are done; otherwise, repeat this process until the surface is clean.
2) RESTART
- After cleaning, most parts simply look dull or worn and may have small nicks or scratches. Applying a thin paste wax layer with a suitable color will remove discoloration from nicks or scratches and give the piece a uniform, smooth, satin-like shine. Re-stain with an appropriate wood color to replace the missing color. Use the remover to remove most cloudy discolorations.
- In the effort to revive a more severely degraded finish, such as one with scratches or wrinkles, varnished and lacquered surfaces should be approached differently. The basic idea in reviving a lacquer finish is to soften the finish so that surface imperfections are smoothed out and healed. This is done by applying the appropriate solvent thinner, lacquer thinner, and some other solvents to retard the action of the solvent thinner.
3) REPLACEMENT
- There are times when the finish is so worn or damaged, or when a water stain has blackened the wood underneath the finish, that it simply must be removed and a new coating applied.
- For best results, remove the old finish and apply a new one. However, you can achieve a good result on your own by using a high quality remover sold at a hardware or paint shop. Lacquer is best applied with a spray, so if you want a lacquered finish, you should consider taking your piece to a finishing shop.
Restoring Old Wooden Table
To restore an old wooden table we must follow the following steps:
1) Start the Restoration of your Old Wooden Table with a thorough cleaning. Apply some wood cleaner to the fine quality steel wool. Work the grain and rub the surface of the old wood furniture with the cleaner and the steel wool. Do not apply too much pressure because you do not want to remove the finish or stain. Most of the time, years of accumulated wax make the surface of the wood dirty and grimy. Steel wool and wood cleaner will cut through these layers. Wipe off the loose dirt and grime with a clean cloth and let the piece dry.
2 ) Saturate a soft cloth with furniture oil. Rub with the grain to apply the furniture oil to the wood. Fold the cloth and apply oil to one edge to obtain detailed cracks or decorations in the wood. Cover wood furniture well with oil.
3) Allow the piece to soak overnight to hydrate the wood if it is extremely dry. After covering the entire piece with furniture oil, you can either run it or choose to follow the steps below, depending on the level of protection you want for your wood furniture.
4) Rub the wood furniture piece with a clean portion of steel wool in the direction of the grain. This eliminates high spots, as it prepares the wood for the next step.
5) Add a sealing coat to keep the wood hydrated, if desired. Apply tung oil, also known as China wood oil, on the surface of the wood furniture, following the wood grain with patterns. After the tung oil dries, it hardens and provides a plastic layer on the wood.
6) If desired, polish the wood furniture with wax, but make sure to polish the enamel well after application. Be sure to work in small sections, with the grain of the wood.
Restoring Rustic Wooden Table
Rustic wood dining tables add a touch of warmth and rustic charm to any home. Whether the table is old or finished to look that way, gentle care and cleaning methods are required to make it look its best.
Unfinished hardwood should not come into contact with water because it can absorb water and cause swelling or water spots. If dry cleaning and dusting do not remove the dirt, mineral spirits may be used. For finished wood, pH-balanced liquid soap can remove most dirt and residue without damaging the finish.
- Dust the table with a soft, dry cloth, brush or vacuum with a brush.
- Dilute a few drops of mild pH neutral soap with 2 cups of warm water in a container. Dip a cotton diaper in the solution and drain. Clean the wooden table thoroughly to remove any dirt or residue. For intricate carvings or small details, use cotton balls or swabs dipped in the cleaning solution.
- Clean the table with a clean cotton diaper moistened with distilled water. Rinse, wring out and wipe off all traces of soap residue. Dry any water with a sponge or dry cotton diaper.
- Apply a light layer of microcrystalline wax with a cloth or cotton brush and allow to dry for 15 minutes.
- Polish the table with a cotton diaper or shoe polish brush to restore the shine.
Restoring Stained Wood Table
- Use a damp cloth to thoroughly clean the table surface and remove any dirt or grime. Doing this before sanding will give you a smoother finish.
- To remove the varnish from the table, use a coarse 40 grit sandpaper with an orbital sander. Sand the top and sides of the table. Be sure to regularly check the grit on the sandpaper and replace it when it is worn. When you are sanding, don’t forget your safety equipment and place loose sheets on the floor.
- When sanding, remove dust from the table regularly. This is so you can see how much more sanding you need to do on the surface.
- Continue sanding with coarse grit sandpaper to reattach the table to your bare wood. Be sure to continue to check the grit on the sandpaper and replace it when necessary.
- Once you have removed the table back to bare wood, change the sandpaper to a finer grit, such as 240 grit. This will help you sand the table until it is smooth. Remember to always sand with the grain and remove dust from the table.
- Clean the table with mineral turpentine to remove fine dust and debris that may be left on the table. When using turpentine, wear your dust mask.
- After the table is dry, it is time to apply the first coat of varnish. Stir the varnish thoroughly to get rid of any lumps. With a little varnish on your brush, apply it on the table, accompanying the grain. Watch for runs when working around an edge or in a joint.
- Smooth out any runs with the brush as they occur. Allow the first layer to dry thoroughly.
- Once the first coat of varnish has dried, give it a little sand with a fine sanding block. This will give you a smooth glossy finish. Dust off.
- Stir the varnish well again before use. Apply the varnish in nice long strokes, always following the grain. Let the varnish dry.
- And there you have it, a fantastic piece of wood restored to its former glory.
Restore Wooden Dining Table
This is the easiest, cheapest and most natural way I have found to restore the Wooden Dining Table without the use of chemicals and waxes that are too expensive.
- Clean thoroughly
- Sand the wood to remove any imperfections (or as much as possible to make it fade and blend with the wood)
- If your wood needs a little extra help to get rid of the stains.
- Cut half a lemon and rub the cut side on the grain, the acid will naturally whiten the residue stains. Leave it for a few minutes before cleaning, wiping and then wiping dry.
- Finish with a natural homemade mixture, 1 part white vinegar and 3 parts olive oil, whisk and rub the pimple.
- Wipe off any excess oil.
- Let it dry overnight and you will wake up to a smooth, new tabletop.
- This method of maintaining wooden furniture is very easy and I will continue to do so from now on. I just hand-sanded the table, but maybe next time I will try to take out the power tools.
- If in doubt, try a test patch and be sure to let it dry for a few days to see the final result.
Related Topics

HOW TO WEAR MENS BOOTS ?
¿ HOW TO CLEAN WOODEN FLOORS ?
HOW TO PAINT PINE WOOD ?
HOW TO PAINT OLD FURNITURE ?

LAWN CARE AND MAINTENANCE

HOW TO CLEAN SUEDE SHOES ?
Wood Related Topics in ALPHAPEDIA
HOW TO MAKE WOODEN BENCHES ?
HOW TO PAINT PINE WOOD ?
HOW TO SAND WOOD With or Without Sandpaper
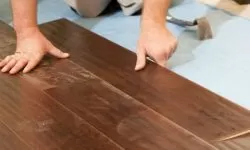
HOW TO INSTALL FLOATING PARQUET FLOORING ?
OLD WOODEN BENCHES: Great Price on Qualified Products
HOW TO PAINT EXTERIOR WOOD ?
Power Tools for Sanding in ALPHAPEDIA

ORBITAL BOSCH SANDER: Great Price on Qualified Products

MAKITA SANDER: Great Price on Qualified Products

ELECTRIC SANDER: Great Price on Qualified Products

TYPES AND MODELS of WOOD and ELECTRIC SANDERS
AIR or PNEUMATIC SANDER: Great Price on Qualified Products
PNEUMATIC SANDER for Metal, With Vacuum. Its Prices and Brands
Other Topics of Interest in ALPHAPEDIA

FREE BACHELOR DEGREE IN NANOTECHNOLOGY
WHAT AN ENGINEER DOES ?

MUSTARD COLOR: Psychology and Meaning
FREE BACHELOR DEGREE IN CHILD, YOUTH AND FAMILY

GOD ANUBIS: Who Is ? History and Mythology. The God of DEATH
💚 WHAT IS INDUSTRIAL ENGINEERING ?
HOW TO RESTORE A WOODEN TABLE IMAGE