How to Make a Recycled Wood Pot ?
- Replacing boring terracotta pots with interesting DIY pots will make your garden wonderful.
- Pallets are not a new material for the DIY world. From furniture to candlesticks, you can do almost anything with pallets, including planters.
- To use the pallets. you have to break them down and turn them into a box , put some soil on them, you can hang boxes on the wall or you can take the pallet and stand it up, forming a vertical planter.
- The best thing about vertical planters is that they are space efficient and keep all your plants organized. It is extremely simple, the limit is your imagination.
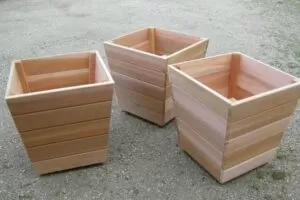
How to Make an Outdoor Wooden Planter ?
- Determine the size of the pot box. It is best to use pressure treated wood or cedar because they will be outdoors.
- Cut the side and end pieces to the size you want. Then fix them together using galvanized screws. Measure the interior length and width of the box.
- Cut a piece to fit at the bottom. Secure the bottom through the sides with galvanized screws.
- Add plugs and drill drain holes
- Attach staples to the bottom of the box. This will give you a good profile and prevent the box from damaging the rail over time.
- Drill three or four drainage holes in the bottom of the box. Paint it and let it dry. And you are ready to use it.
How to Make a Rustic Wooden Pot ?
- You will start by drilling holes in your trunk, in the shape of a circle.
- If you use a drill that is longer than the trunk, be careful not to go through it.
- Joining the holes: For this, you will use a drill that is larger than the one you used to make the holes. The bigger, the better. You will use it to enlarge the holes you made until they are joined together.
- Removing the middle of the trunk: Take a chisel and a hammer and start removing the wood from the middle of the trunk. This way, small pieces of wood will come out. Do this until you have a nice hole in the middle of your pot.
- The next thing you do is give your edge a nice smooth look with sandpaper.
- Protect your pot: Because the soil inside the pot will hold moisture, you will need to protect it from rotting. To do this we paint it with varnish.
- To make sure it is well protected, paint it in several layers. And once the varnish has dried, you are ready to plant whatever you like in your new pot.
How to Make a Wooden Pot for Plants ?
Wooden planters look great in the garden or on the terrace. They fit in with the green environment and make the garden even more beautiful. That’s why you should start making some of these wooden planters. We will make a small pot with plywood.
Step 1:
Cut the plywood into 10 squares, approximately 140 mm x 140 mm. I used 10 mm plywood, but you can use any size and as many pieces to create different shapes.
Step 2:
Mark and punch the center holes.
Step 3:
Drill holes with a hole saw in all but one square. I used a 127 mm circular saw. This is a standard size hole saw and means that the plywood pot will accommodate a 125mm pot, a standard size plant in most stores.
Step 4:
Take one of the circular cutouts from the hole saw and cut a smaller hole inside. This can be any size, but the most important thing to remember is that there will be drainage holes in its center. This will make more sense later.
Step 5:
Sand all parts.
Step 6:
Glue all the pieces together as close to the square as possible.
Step 7:
Once the glue dries sand the pot. With a belt sander you can quickly do the job.
Step 8:
Drill 3 10 mm holes for the drainage and place the circular foot.
Step 9:
Mix epoxy for 5 minutes and apply generously to interior walls.
Step 10:
Cover the holes below with masking tape and then apply epoxy to the interior base.
Step 11:
Once the epoxy has cured, drill a slightly smaller 5 mm hole in the drainage holes.
Make sure the holes are centered. This ensures that the drain holes have an epoxy coating on the inside.
Step 12:
Do a final sanding (up to 240 grit) and clean all dust from the saw with methylated alcohol.
Step 13:
Mix flaxseed oil and turpentine in a 50:50 ratio and apply at least 2 coats. Since this will get wet from time to time when you water it, it is worth doing more coats than you normally would.
Step 14:
Wait a couple of days for the epoxy to cure and then apply your plant.
How to Make a Wooden Pot for Orchids
- First you want to find out what size pot you need for your orchid.
- You also want a background for your pot, so cut out enough pieces for that too. We will choose to use four evenly spaced pieces for the bottom.
- On two sides of your pot, you will need two smaller pieces to make both sides the same height. To measure this, take one of your pieces and subtract the width twice and you should have a good perfect fit.
- After trimming the pieces, you can choose to sand and smooth the edges if you wish.
- Now you have all the pieces you want and it is time to drill the holes.
- I marked where I wanted the holes and then drilled. Then I simply sat that piece on another unfinished piece and drilled both pieces for consistent spacing.
- Begin by assembling the two center pieces at the bottom. I took a piece of wire and made two 90 degree angles at the distance of the two holes.
- Once this is done, run them through the two center pieces and the piece that was attached to them to finish it off in a small loop.
- The next part is quite simple. Take four pieces of wire and make a loop at one end. Then run it through the remaining two bottom pieces and their corresponding holes next to the two you just placed.
- Continue to stack your pieces until you have used them all. Then, loop the wire to hold all your pieces tight.
- The final part is to glue the two smaller finish pieces in place.
- The glue should dry over time (depending on what type of wood glue you have chosen). And it is finished.
How to Make a Round Wood Pot ?
Making the slats
Step 1
Cut the cedar boards into 15-inch long strips, making a total of 24 strips.
Step 2
Place a 7.5 degree bevel along both sides of each slat, facing inward so that each slat is wedge shaped. Using the table saw, tilt the head 7.5 degrees and lay the staves on a flat surface. The width of one side remains unchanged, the other side becomes slightly smaller. An alternative method is to route the staves with a shallow chamfering router bit.
Step 3
Optional: using a router, place a 1/4-inch knot on one edge of each slat and remove a 1/4-inch bowl from the other side.
Step 4
Cuts slots in the outer (wider) faces for metal strapping. You need two 9/16 inch wide by 1/8 inch deep slots located 2 inches from each end. Place the blade and pass all the slats through the table saw, turning them over for the second slot. Alternatively, use a bit of peel on your router. Cut a similar groove on the inside faces to make the bottom board sit up. Place it 1 inch up from the bottom and 1/8 inch deep.
Step 5
Check your work after making a couple of ribbons! Put them together, then place them on the table below and check if the diameter of the finished pot is good. Check that the strap and the bottom board fit into the slots. Sand the upper edges of the staves. Optionally, you can round off the tops to help the water run off.
Bottom board and assembly
Step 1
Place all the slats in an upright position and check that they fit correctly. To keep them upright temporarily, attach a tether or rope around them. Measure the inside diameter of the planter. Using the jigsaw, cut the bottom board into a circle ¼ inch wider than its inside diameter measurement.
Step 2
Paste the slats together. If you are gluing, apply wood glue to the edges of each slat; you need to work fairly quickly to prevent the glue from drying out. Assemble the staves around the bottom board, making sure they fit into the inner groove. Hug them together again. If you have a nail gun, place a nail through each slat on the bottom board, using 1 or 1 1/4 inch brads.
Step 3
Install the metal strapping. If using a strapping gun, install it before the glue sets, and it will act as a clamp while the glue sets. If you are replacing plumbing tape, use the clamp to hold the parts in place for 30 minutes while the glue sticks before fixing the metal tape in place with wood screws through the drilled holes.
Step 4
Apply polyurethane or other exterior wood protection.
How to Make a Bonsai Wooden Pot ?
- You will need pressure-treated wood made of oak against all climates.
- You will also need a brush, nails and assorted plastic containers.
- Drill holes in the bottom of the plastic container. Then, cut it to size. Cut the pieces of wood to the correct size and then align and tape them together.
- Then nail the pieces of wood together. Now, place two pieces of wood on the bottom for the legs. This allows air to flow under the pot. Then place the container inside the wooden pot.
- Now, place the bonsai tree inside the plastic container. This is an easy way to make a wooden pot for your bonsai plant.
How to Make a Wooden Pot with a Wooden Box
- Making a pot with an old wooden box is simple and very attractive and, of course, original. Due to the generous size of these boxes these pots can handle much more than just a plant.
- You can use them to transform your patio into a salad garden or to plant some fresh herbs or spices for cooking.
- Nature does most of the hard work, so all you have to do is fill the pots with fertile soil.
- Make sure the water can drain away and then, when the plants grow, you can be proud of them if you work. Also, have a cool spot of vegetation on your balcony or patio.
How to Make a Wooden Pot in the Oven ?
- The boards of this pot are produced from thermally modified wood that goes through a process that changes the chemical composition and cell structure of the wood.
- The process creates wood with exceptional resistance to rot, pests and decay and is environmentally friendly.
- The thermal modification process also prevents moisture absorption and makes the wood resistant to warping, twisting and other movements.
- The steps to make the pot are the same, we cut the wood the size we want it, we drill the holes in the base to let the water flow.
- Sand the boards, assemble the pot, with all its parts already clean and sanded. Put varnish on it and let it dry well before placing the plant you want to plant inside.
- Due to the heat treatment of the wood you should not worry about water rotting or damaging it.
Home Related Products in ALPHAPEDIA
ADHESIVE TILES: Prices, Brands and Types or Models

💚 WALL LAMPS: Rustic, Modern, Indoor and Outdoor
💚 WALL LAMPS MODERN: Great Price on Qualified Products

DOG AND CAT SCALES: Prices and Offers

OUTDOOR ELECTRIC FLY SWATTER PRICE

CASSETTE FIREPLACE: Great Price on Qualified Products
Learn How to Do Things in ALPHAPEDIA
HOW TO CLEAN THE HOME CHIMNEY IN AND OUT ?
How to INSTALL LAMINATE FLOORING ?
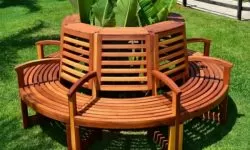
HOW TO MAKE WOODEN BENCHES ?
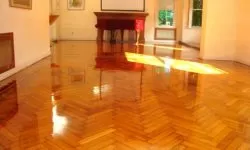
¿ HOW TO CLEAN WOODEN FLOORS ?
HOW TO CARE FOR AND MAINTAIN THE WOOD OUTSIDE ?

LAWN CARE AND MAINTENANCE
Other Topics of Interest in ALPHAPEDIA

FREE MASTER DEGREE IN ENVIRONMENTAL ENGINEERING
FREE MASTER DEGREE IN CONSTITUTIONAL LAW

FREE BACHELOR DEGREE IN CRIMINAL JUSTICE
FREE BACHELOR IN REAL ESTATE
FREE BACHELOR DEGREE IN CULTURAL MANAGEMENT

FREE DOCTORATE IN TOXICOLOGY
Wooden Planter Image